

I've been so excited to share this post with you because it was a favorite of ours! I've mentioned a few times before how I try to have a more structured learning activity (which is art a lot of times) for the girls most days a week. As far as my beliefs on kiddos needing both free, uninterrupted play time and more engaging opportunities to learn, I stand in the middle. I believe in both! With just a tiny bit of planning ahead and discipline there is a whole, HUGE world of imaginative learning possibilities waiting!

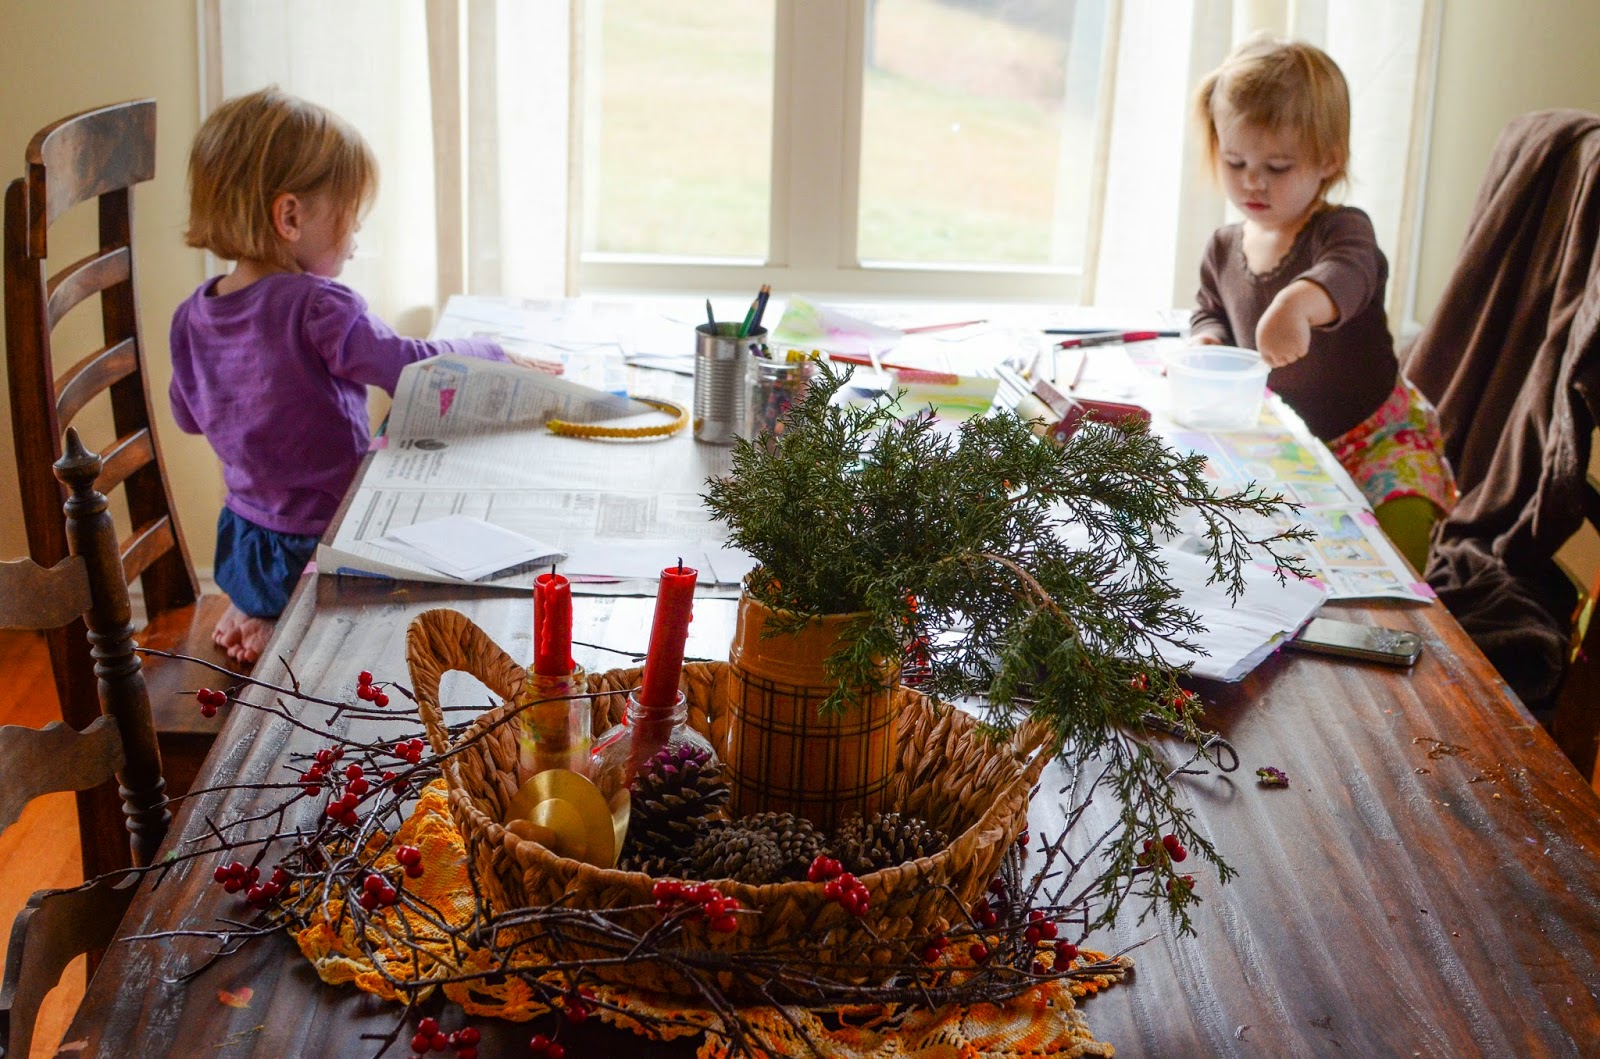
I usually set up the activity for the day during the girls' rest time and then it's a fun way for them to wake up and transition from the afternoon into early evening (and dinner prep). Often they'll get so involved in the activity I'm able to participate with them for a while and then easily move from the table into the kitchen to make dinner. This particular afternoon I started with my trusty roll of white poster paper (75 feet for $7.99 at Target!), my favorite brand/kind of tape ever (Scotch brand masking tape), and some scissors. I taped paper over half of the table, making sure to cover the ends and corners since I knew we would be using a lot of paint.

Next I started to lay out the printmaking supplies! This is when it got really fun and MY own imagination started getting really excited! Some of the items we used were broccoli, celery, cucumbers (my fave), pinecones, potato stamps, potato mashers, brillo sponges, and big round poofy sponges found on the kitchen aisle. Basically you could use anything that catches your eye and has some great texture.
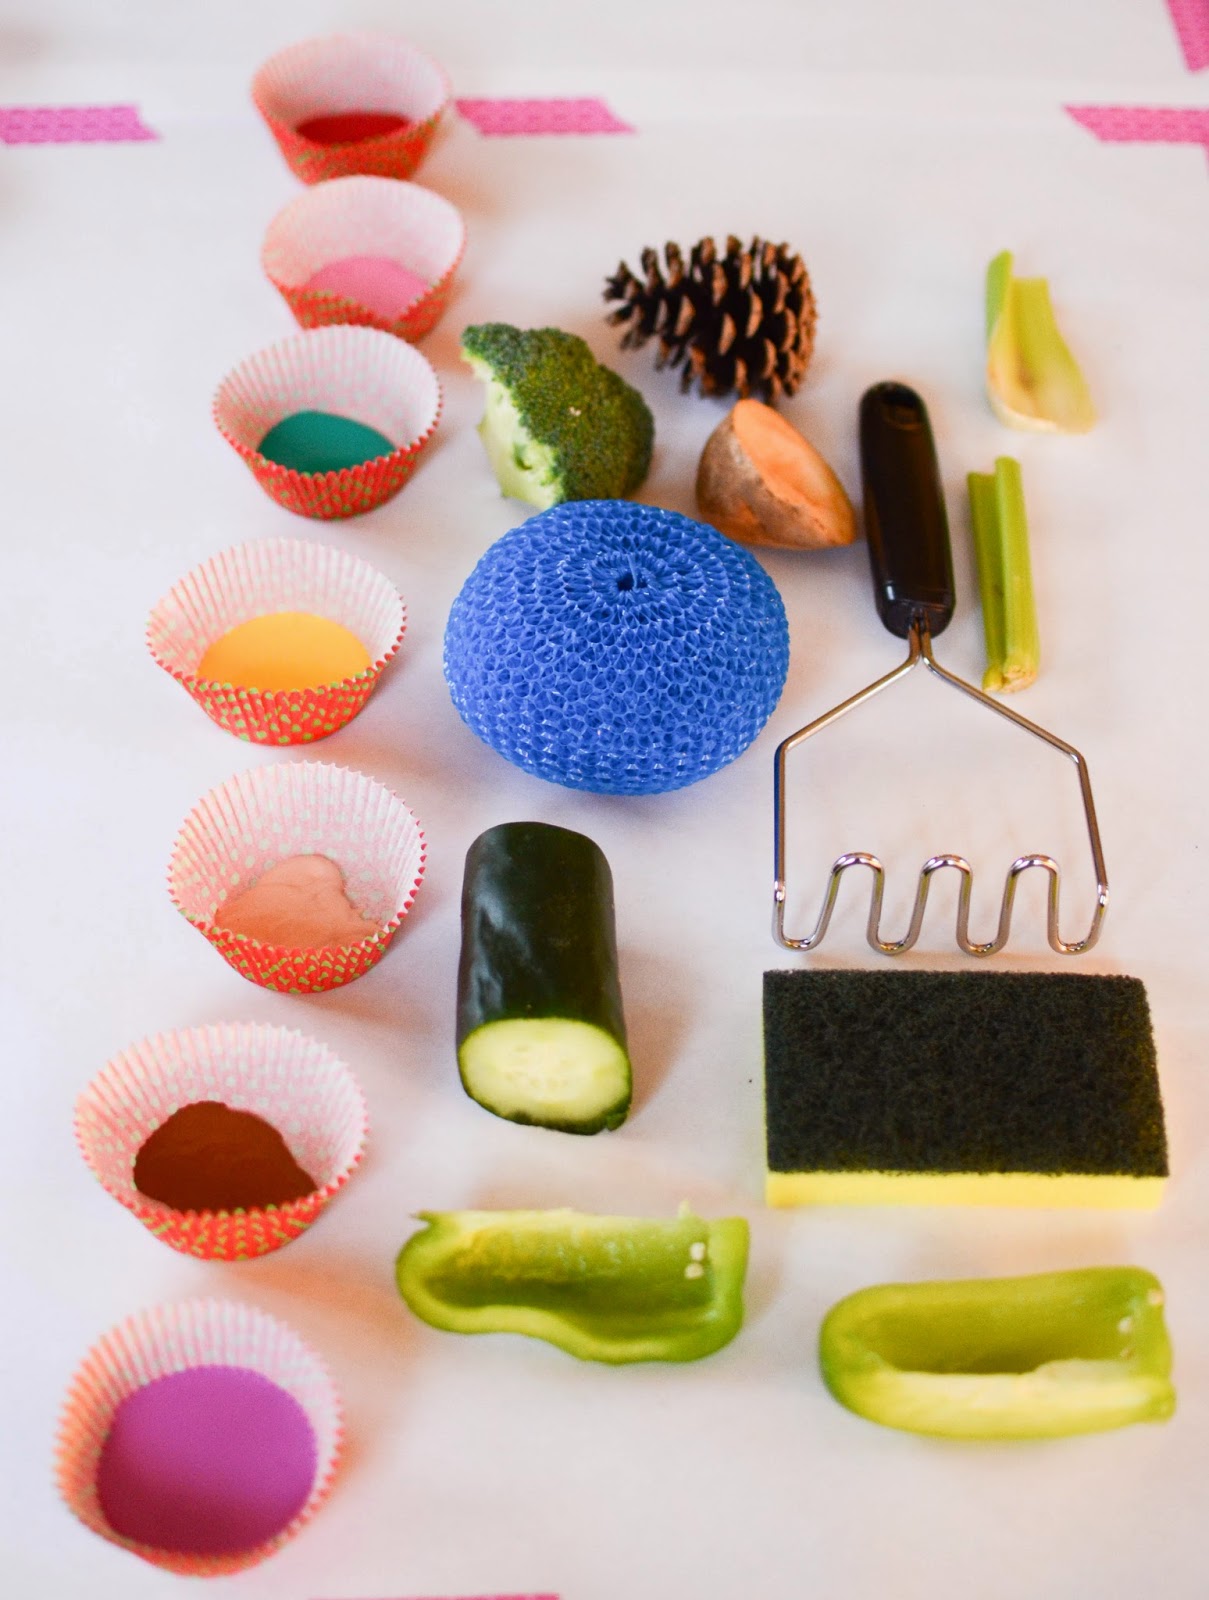
I also laid out some cupcake liners we got on clearance with plenty of colors of paint!
(a note on using the liners-they look pretty and the paint looks organized but after a few dips into the paint they toppled over, smooshing the paint inside. I recommend using an egg carton instead, which is what we normally use).

We use regular acrylic craft paint for almost all of our projects. I just find the colors to be so much more exciting than the primary washable paints. With that said, I've learned with each girl how to keep them paint free. Anna Ruth can easily wear an old button up of mine with the sleeves rolled up and Betsy Grace wears an old pair of footie pi's. If using pi's for a paint shirt bothers you, try looking for an old pair at the thrift store or a pair on its way to the trash! (or maybe you don't leave your kiddos in jammies as much as we do and yours aren't as worn out?!)

I usually introduce the activity of the day with a simple "Go see!" That's all it takes to get the girls excited! Then I follow up with some very simple directions, like dipping a couple of the print making tools into the paint and showing them to how to stamp it on the paper.

Other than that, and giving a few safety guidelines obviously (like don't actually eat the cucumber, celery, or potato!), I generally let the girls have free reign. They are typically their most creative, imaginative selves when I step back and let their minds do the talking.


You all, these simple little printmaking items made the coolest designs and patterns and textures ever!! Anna Ruth was very loudly exclaiming what shape or design she made and especially liked it when several colors ended up on the item together, creating a rainbow effect on the paper.

As always, I was amazed at how different both girls papers turned out given the fact that they had the exact same supplies and exact same paint colors.


Betsy Grace has just now started to care a tiny bit when she gets paint on herself and will run for a towel or a wipe. She generally loves a good mess and the bigger the better!

I mean really! How gorgeous is that?!


The girls actually got SO into this that they asked me to put paper down on the second half of the table as well! Which I did, happily. :)


After we wrapped up Part One of our print making I moved the papers to my craft room to dry and rinsed the tools out real well. The next day I set out some plain index cards, Sharpies, and some pens. I lined the table with newspaper to protect it from marks and asked the girls to write thank-you notes on the index cards.


Anna Ruth was quite able to do this and Betsy Grace mostly played. But, both enjoyed themselves!
As Anna Ruth was writing on her index cards I got our huge printmaking paper back out and cut one of them into squares. Next I showed Anna Ruth how to glue her index card to the back, where the writing showed. These became our Christmas thank-you cards! (which I still need to mail!)

(Whoa, the angle on this photo looks like we're about to slide off the table!)
But in the end we had a happy stack of original printmaking thank-you cards to send and a fun experience to remember!
The girls are already asking to do this again! I'll have to put my thinking cap on and come up with some different tools this time around!
What have you done with your kiddos that was a huge success?
(and adults, I think this activity would be just as fun for you, even if you don't have kiddos at home!)
Happy printmaking!
(just don't eat the broccoli)


Sara,
ReplyDeleteThis is so precious and fun! I'm going to share this on my homeschooling page on FB.
Thank-you so much Debbie! We had a blast! :)
Delete